Configure Site-to-Site Connectivity for Databases
This guide provides step-by-step instructions for using ngrok for site-to-site connectivity. This example shows you how to run the ngrok agent at an external site to get access to a locally running database.
The connection will be unencrypted. ngrok recommends configuring end-to-end encryption with mTLS. . However, we understand there are times when you may wish to configure an unencrypted connection such as during testing or proof of concept. Therefore, we provide the steps in this guide, but we recommend configuring mTLS before going to production.
Install the ngrok agent
Download the appropriate version and install it on the same subnet as the APIs you want to access.
Get an ngrok API Key
Create an ngrok API key using the ngrok dashboard. Make sure you save the API key before you leave the screen because it won't be displayed again.
Configure a custom agent ingress address
Configuring a custom agent ingress address allows you to provide your customers with
a dedicated URL to connect to the ngrok platform. Since your customers will connect using your subdomain,
they can safely block other ngrok domains to control the tunnels started in their network. You'll provide a
subdomain you own, such as connect.{YOUR_DOMAIN}, and delegate DNS (Domain Name Service) control of
that subdomain to ngrok.
Create the agent ingress address
Use the ngrok API to create the custom agent address by running the command below, substituting your own values for the variables:
curl \
-X POST \
-H "Authorization: Bearer {API_KEY}" \
-H "Content-Type: application/json" \
-H "Ngrok-Version: 2" \
-d '{"description":"{DESCRIPTION}","domain": “connect.{YOUR_DOMAIN}”}' \
https://api.ngrok.com/agent_ingresses
You should receive a 201 response similar to the following:
{
	"id": "agin_2esRkfoq4frGvOVUmfhytlr2zS3",
	"uri": "/agent_ingresses/agin_2esRkfoq4frGvOVUmfhytlr2zS3",
	"description": "Custom ingress address for site-to-site connectivity",
	"domain": "connect.configurable-domain.com",
	"ns_targets": [
		"ns-1329.awsdns-38.org",
		"ns-737.awsdns-28.net",
		"ns-1940.awsdns-50.co.uk",
		"ns-427.awsdns-53.com"
	],
	"region_domains": [
		"tunnel.us.connect.configurable-domain.com",
		"tunnel.us-cal-1.connect.configurable-domain.com",
		"tunnel.eu.connect.configurable-domain.com",
		"tunnel.au.connect.configurable-domain.com",
		"tunnel.ap.connect.configurable-domain.com",
		"tunnel.jp.connect.configurable-domain.com",
		"tunnel.sa.connect.configurable-domain.com",
		"tunnel.in.connect.configurable-domain.com"
	],
	"created_at": "2024-04-09T19:37:23Z",
	"certificate_management_policy": null,
	"certificate_management_status": null
}
Save the values from the ns_targets property and the region_domains
property as you'll use them later.
Update your DNS
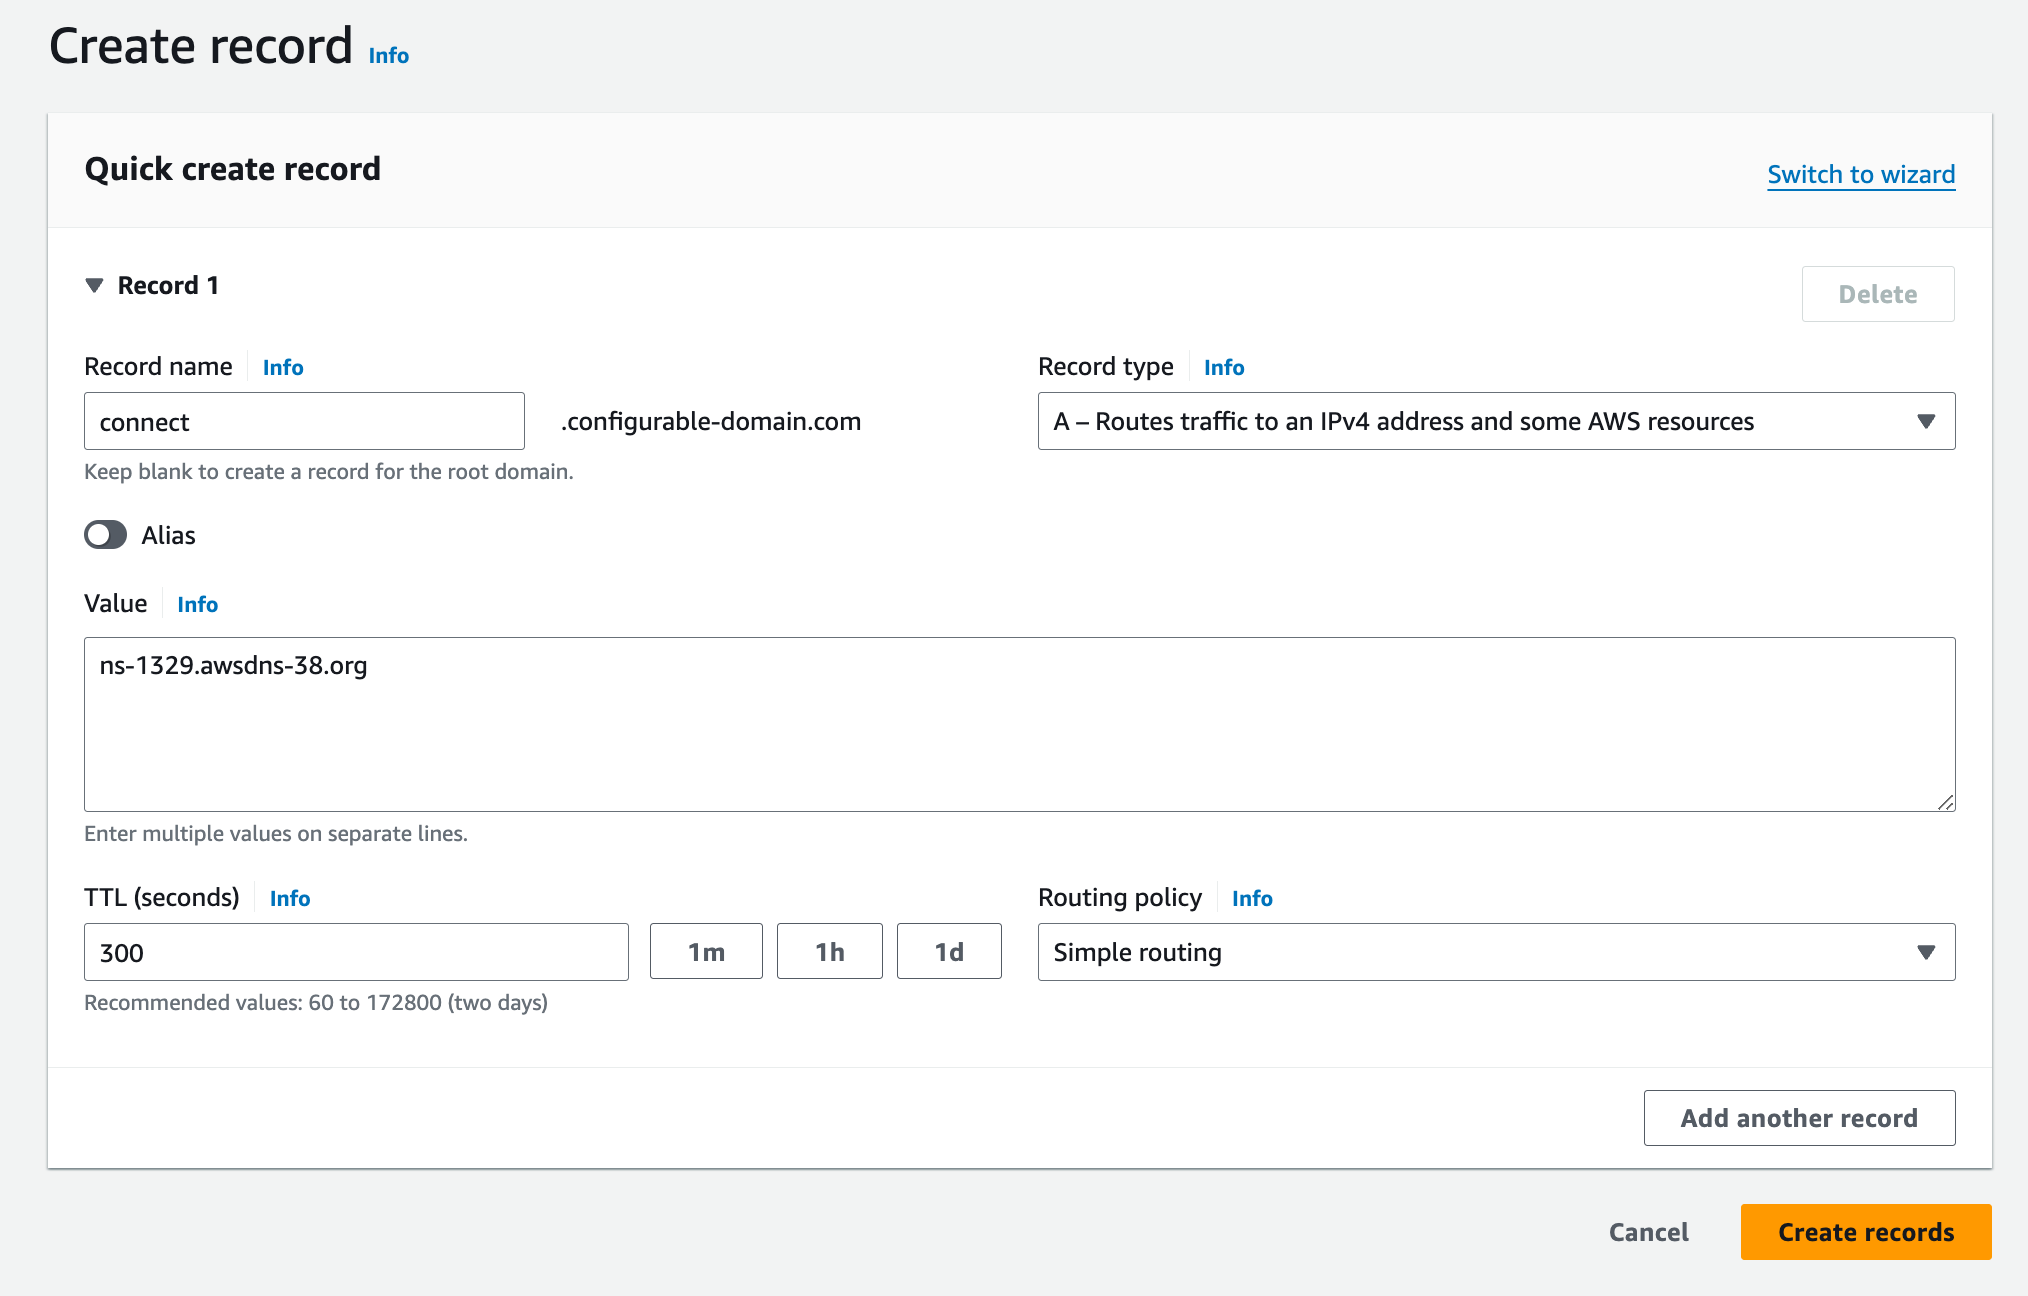
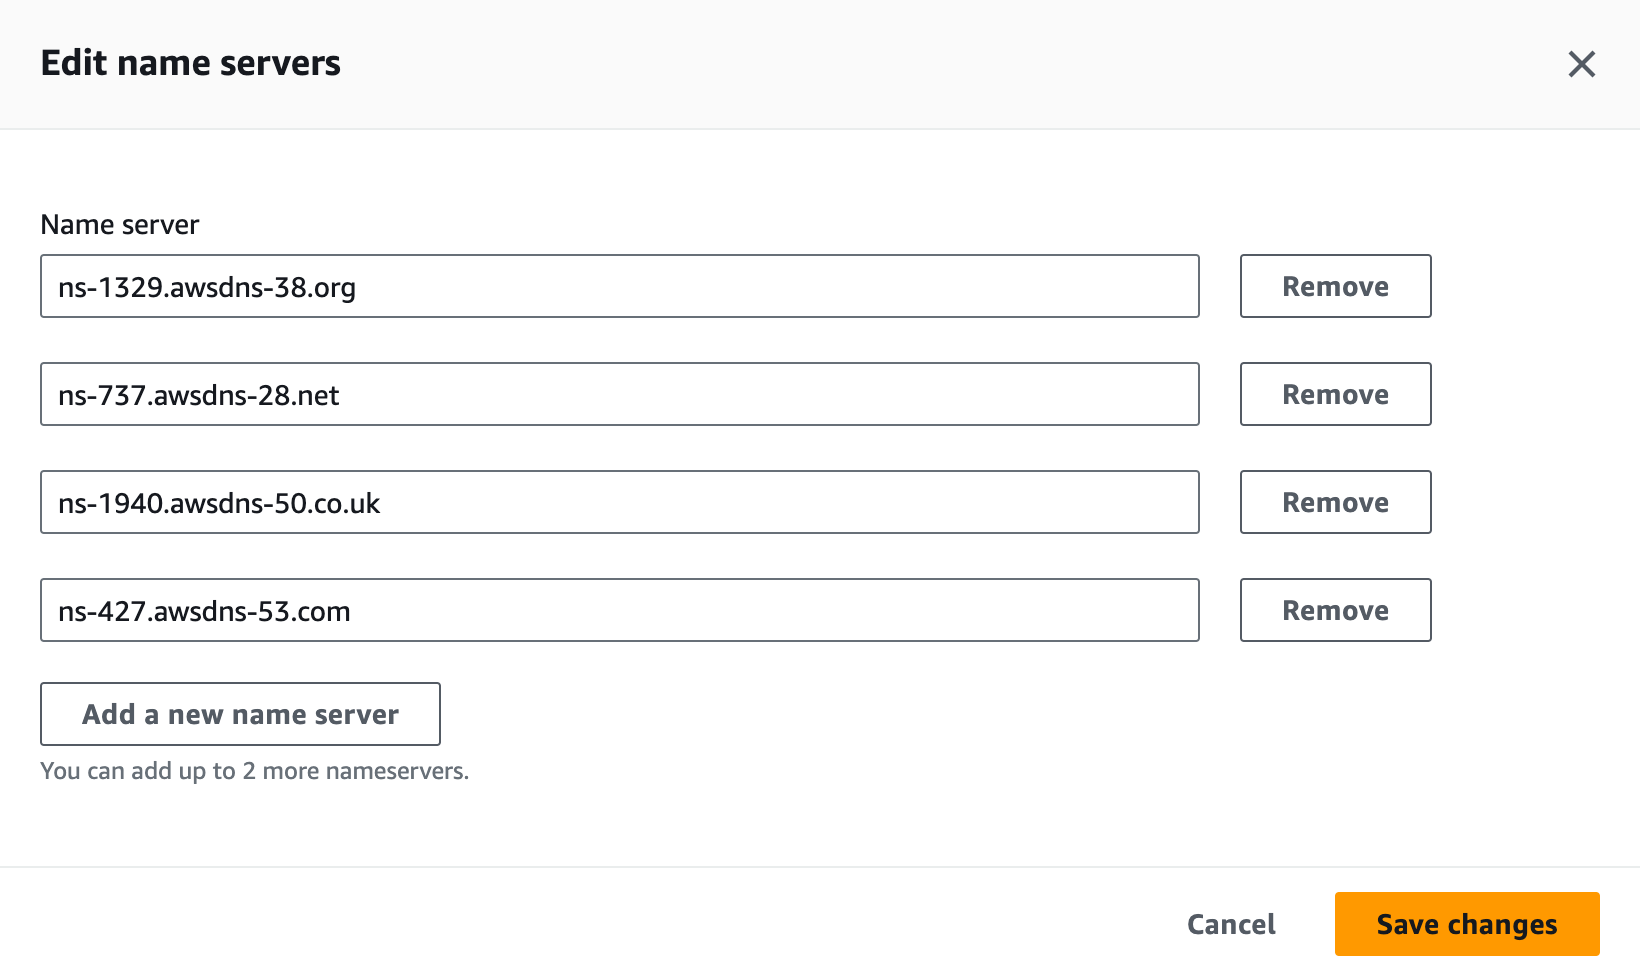
Create an NS record in your DNS provider's registry for each ns_targets value from the
response above, using connect as the name for each entry. The screenshot is from AWS Route53, but
you can use any DNS provider you choose.

You should have four new records when you’re done.

You can run the following command to get the values you need if you didn't save the response.
curl \
-X GET \
-H "Authorization: Bearer {API_KEY}" \
-H "Ngrok-Version: 2" \
https://api.ngrok.com/agent_ingresses
Create a bot user
Now, you’ll create a bot user so that in the next section, you can create an agent authtoken independent of any user account. Run the following command to create a new bot user, providing your API key and a description:
curl \
-X POST \
-H "Authorization: Bearer {API_KEY}" \
-H "Content-Type: application/json" \
-H "Ngrok-Version: 2" \
-d '{"name":"new bot user from API"}' \
https://api.ngrok.com/bot_users
You should receive a 201 response similar to the following:
{
	"id": "bot_2fmwUXhnImKswMgZKCsx7cnbt2l",
	"uri": "https://api.ngrok.com/bot_users/bot_2fmwUXhnImKswMgZKCsx7cnbt2l",
	"name": "new bot user from API",
	"active": true,
	"created_at": "2024-04-29T19:39:36Z"
}
Create a reserved tcp address.
Now, you’ll use the ngrok API to reserve a tcp address and port on the ngrok.io domain.
You’ll start a tunnel on this address and port in a later section. To create a tcp reserved address,
run the following command, substituting your API key for {API_KEY} and optionally providing a description:
curl \
-X POST \
-H "Authorization: Bearer <API_KEY>" \
-H "Content-Type: application/json" \
-H "Ngrok-Version: 2" \
-d '{"description":"<DESCRIPTION>","region":"us"}' \
https://api.ngrok.com/reserved_addrs
You should receive a 201 response similar to the following:
{
	"id": "ra_7jYQXjoDRuKfXrw8BibDg",
	"uri": "https://api.ngrok.com/reserved_addrs/ra_7jYQXjoDRuKfXrw8BibDg",
	"created_at": "2024-04-03T19:08:11Z",
	"description": "TCP for ustomer1 db",
	"addr": "1.tcp.ngrok.io:27702",
	"region": "us",
	"endpoint_configuration": null
}
You’ll need the addr value (i.e. 1.tcp.ngrok.io:27702) when you create your authtoken and start a tunnel,
so take note of it.
Create the agent authtoken
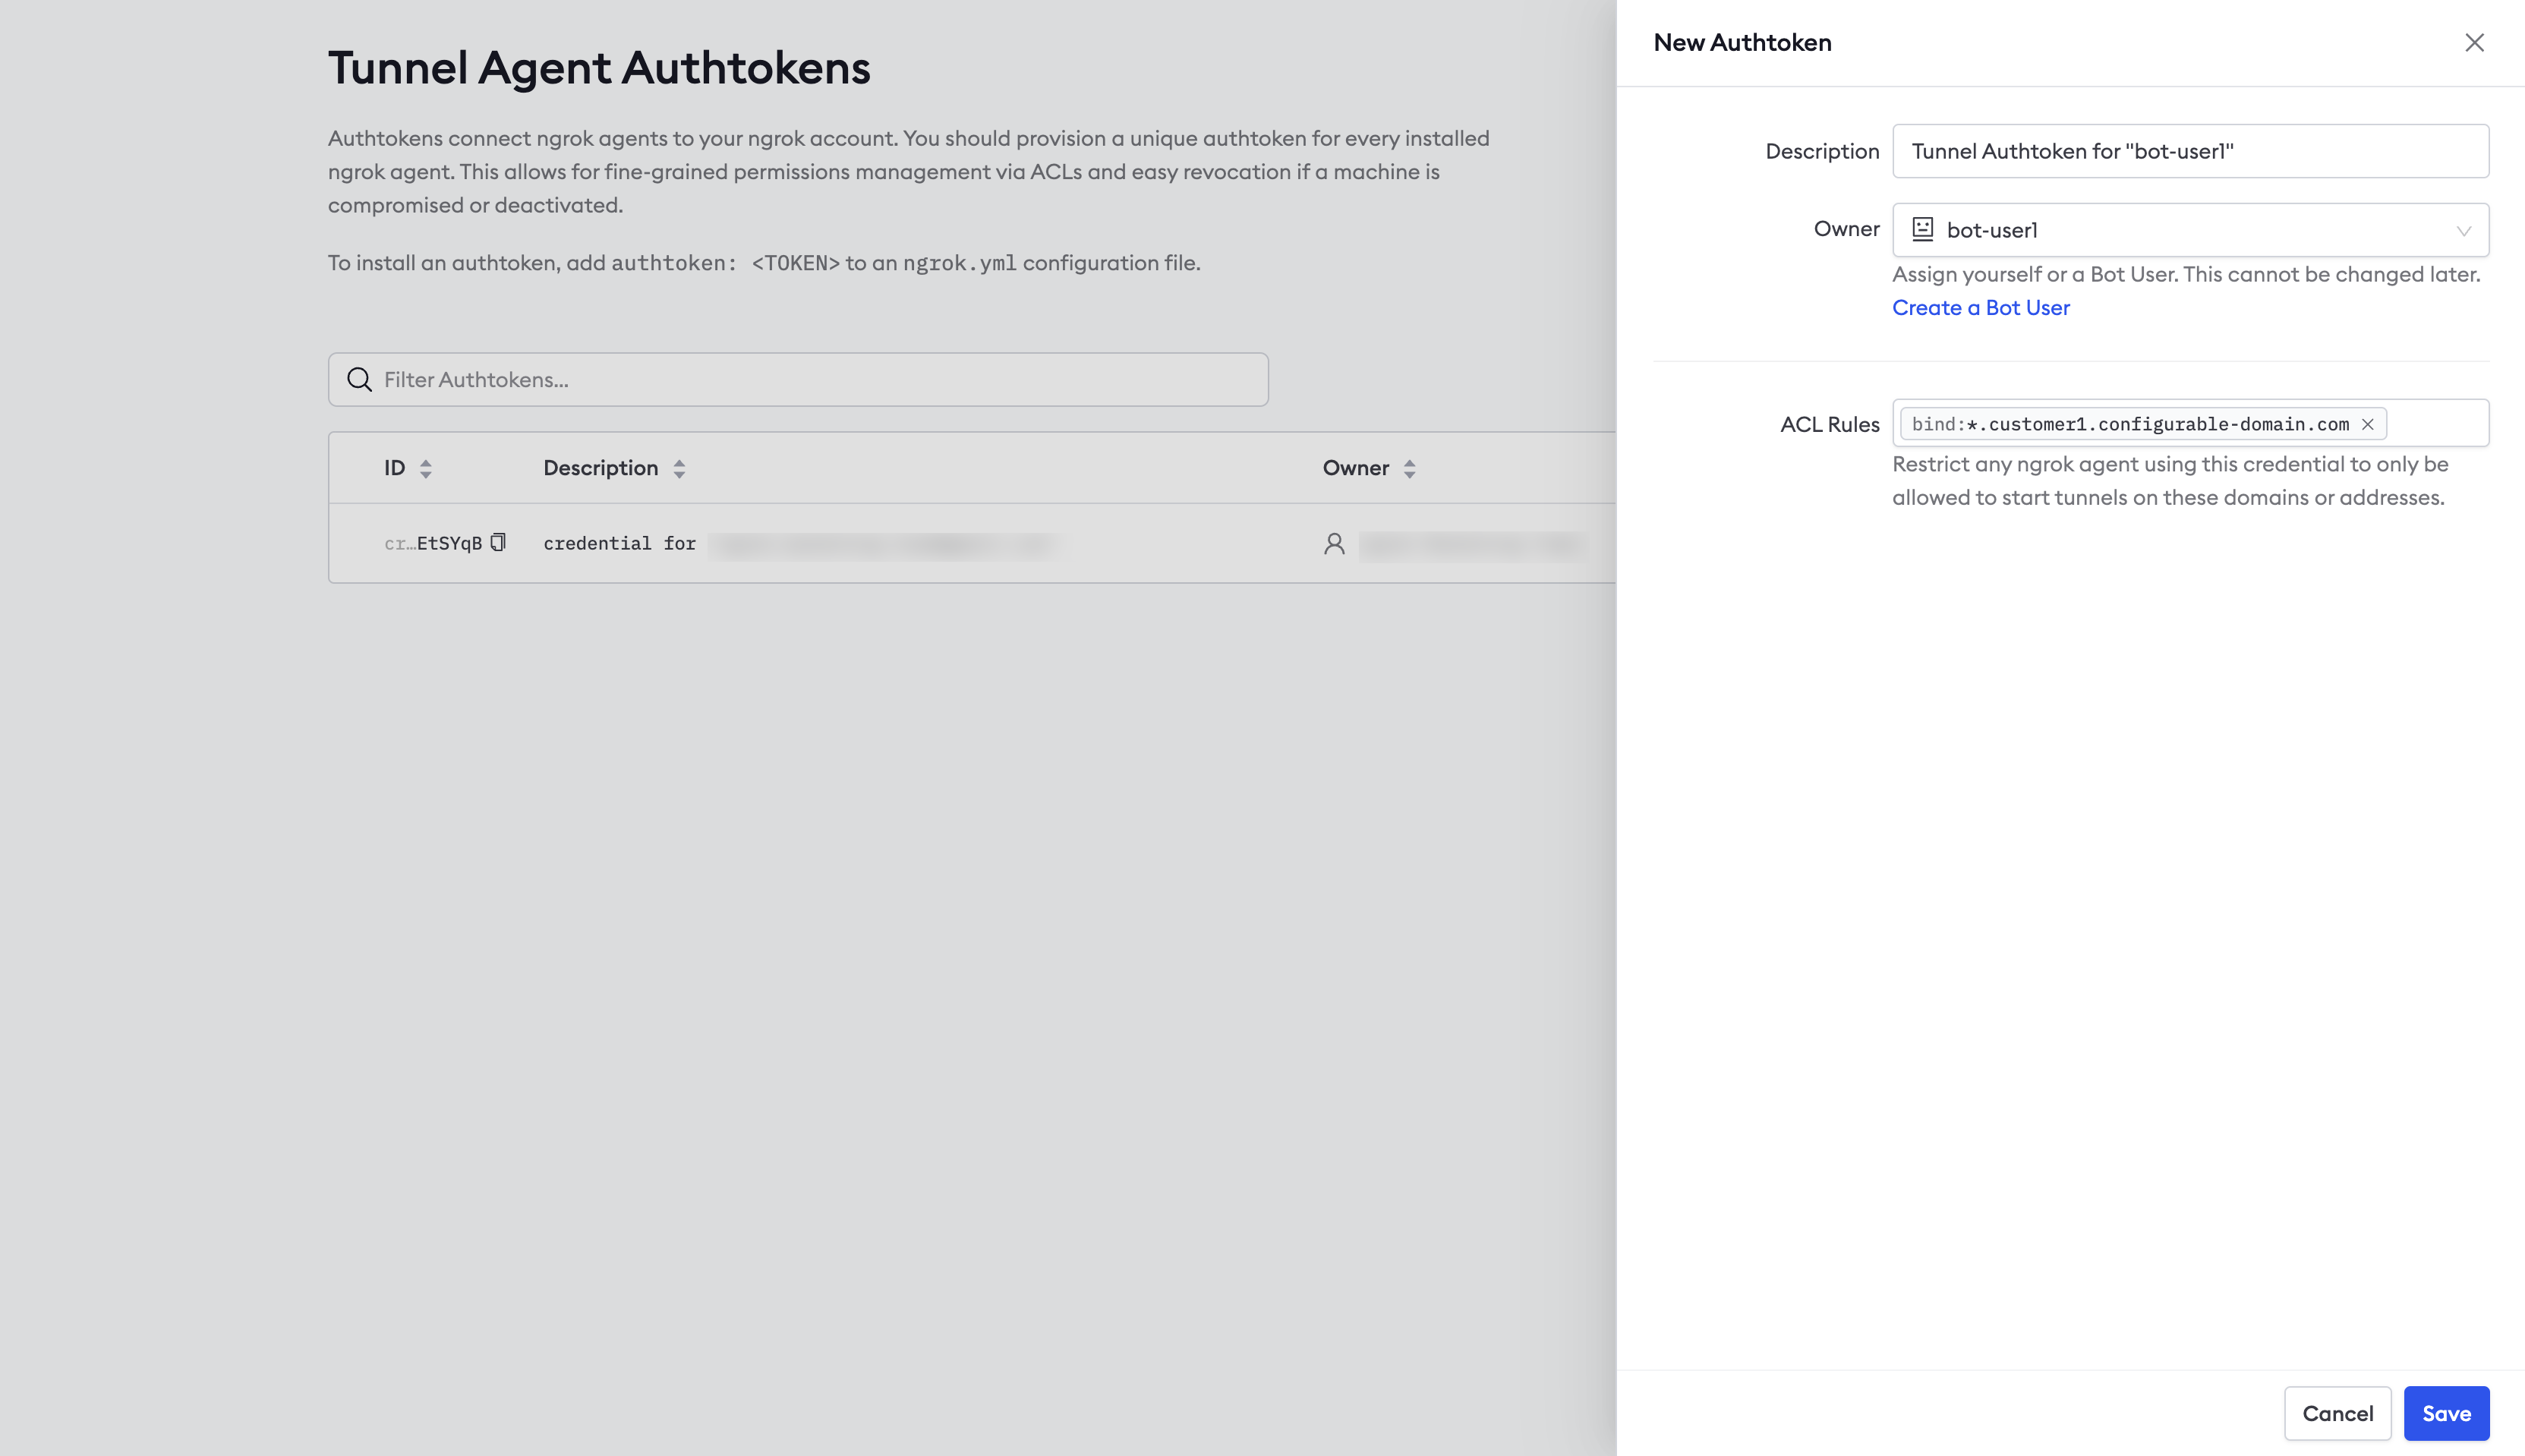
You should start each agent using a separate authtoken, and that token should belong to a bot user.
To create an authtoken, login to the ngrok dashboard and click Authtokens
under Tunnels, then click Add a Tunnel Authtoken.
For Owner, select the bot user you use created, and select bind:*.customer1.{YOUR_DOMAIN} for the ACL Rules.
This ACL will allow an agent with the authtoken to create tunnels on any subdomain of customer1.{YOUR_DOMAIN}.

Configure the ngrok agent API
You can use the ngrok agent API to start and stop tunnels remotely, collect and replay captured requests, and collect stats and metrics.
The API runs on localhost:4040 wherever the agent runs, but you can start an ngrok tunnel to make the API available
remotely.
Please note that tunnels started with the agent API do not persist in the event of an agent restart or network outage.
Update ngrok.yml
Create a tunnel definition in the ngrok.yml config file. You can then run the ngrok agent and start and stop tunnels as needed using the ngrok agent API.
You'll need to modify the ngrok.yml config file before running the agent. You can modify the file that resides in the default location:
- Linux:
~/.config/ngrok/ngrok.yml - MacOS (Darwin):
~/Library/Application Support/ngrok/ngrok.yml - Windows:
%HOMEPATH%\AppData\Local\ngrok\ngrok.yml
Rather than edit the default ngrok.yml config file, you can provide your customer with a separate config file.
This keeps your config separate from their existing ngrok.yml config file. You can then pass it as an argument when
you run the ngrok agent. ngrok merges all config files, and you won't need to modify your customer's config file.
This is useful when your customer already uses ngrok and you wish to use the existing
agent to serve the ngrok agent API.
Refer to the region_domain values you saved when you created the custom agent ingress address.
These are custom addresses for ngrok’s global Points of Presence (POPs).
Support for Global Server Load Balancing (GSLB)
is not yet available when using a custom agent ingress address, so you’ll
need to specify the POP this agent should use to connect to the ngrok platform.
Add the following sections to the ngrok.yml config file, substituting the appropriate values for your environment,
including a subdomain to connect to the agent api, such as agent.customer1.configurable-domain.com:
#config.yml

version: "2"
authtoken: { YOUR_AUTHTOKEN_WITH_ACL }
server_addr: { VALUE_FROM_REGION_DOMAINS }

tunnels:
  agent-api:
    proto: http
    domain: agent.customer1.{ YOUR_DOMAIN }
    addr: 4040
    inspect: false
Start the agent to access the agent API
Now that you’ve updated the ngrok.yml config file, start the tunnel for the agent API by running the following
command wherever you installed the agent:
ngrok start agent-api
Note that “agent-api” is the name given to the tunnel in the ngrok.yml example config file. You can use any descriptive
name for this tunnel. In this case, you’re starting a tunnel to serve the ngrok agent API on https://agent.customer1.{YOUR_DOMAIN}.
If you wish to provide your customer with a custom ngrok.yml config file rather than modifying the one in the default
location, as mentioned previously, you can pass the path to the file when you start the tunnel:
ngrok start agent-api –config /path/to/ngrok.yml
You can pass multiple paths to config files, and ngrok will merge them before starting.
Start tunnels in your customer’s network
Now you’re ready to start a tunnel on the tcp address you reserved using the agent API. To start a tunnel to connect to your customer’s DB, run the following command, substituting the appropriate values for your environment:
curl \
-X POST \
-H "Content-Type: application/json" \
-d '{"name":"{YOUR_NAME}", \
"proto":"tcp", \
"addr":"{YOUR_DB_PORT}", \
"remote_addr":"{YOUR_RESERVED_TCP_ADDRESS}", \
"ip_restriction":{"deny_cidrs":["110.0.0.0/8"]}}' \
https://agent.customer1.{YOUR_DOMAIN}/api/tunnels
Connect to the database
You're now ready to connect to the database at the external site using your favorite database client.